
How to Upload your Website files with File Manager
The File Manager is in cPanel to upload (upload) files – file your website to the hosting server. Let us refer to the steps-the steps to upload a file using the File Manager in your cPanel.
Important note:
All website files are uploaded under public_html directories must be signed. Please follow carefully this article so you don't make a mistake when uploaded.
1. Please login to cPanel
2. Click on menu/File Manager icon
 |
| File Manager icon |
3. Automatically pop-up will appear as below:
 |
| The option after clicking on the File Manager |
If you plan on editing hidden files such as .htaccess, select "Show Hidden Files" and click Go
4. Your Browser will automatically open a new window or tab with the look like the picture below.
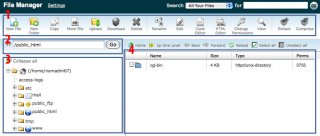
- 1: main Menu file manager
- 2: your current directory location (now you are in the directory public_html)
- 3: contents of parent directory
- 4: the contents of the directory public_html
5. Please click the Upload button in the main menu File Manager
 |
| CPanel File Manager main Menu |
6. Will open a new window or tab in your browser as shown below
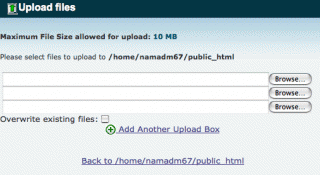
Click browse and select a file on your computer that you wish to upload
7. After you select the files to upload, it will automatically display the progress bar as shown in the picture below
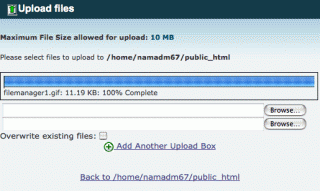
8. If the progress bar is full, it means that your file has been terupload perfectly


0 comments:
Post a Comment